Pull everything out of the box.
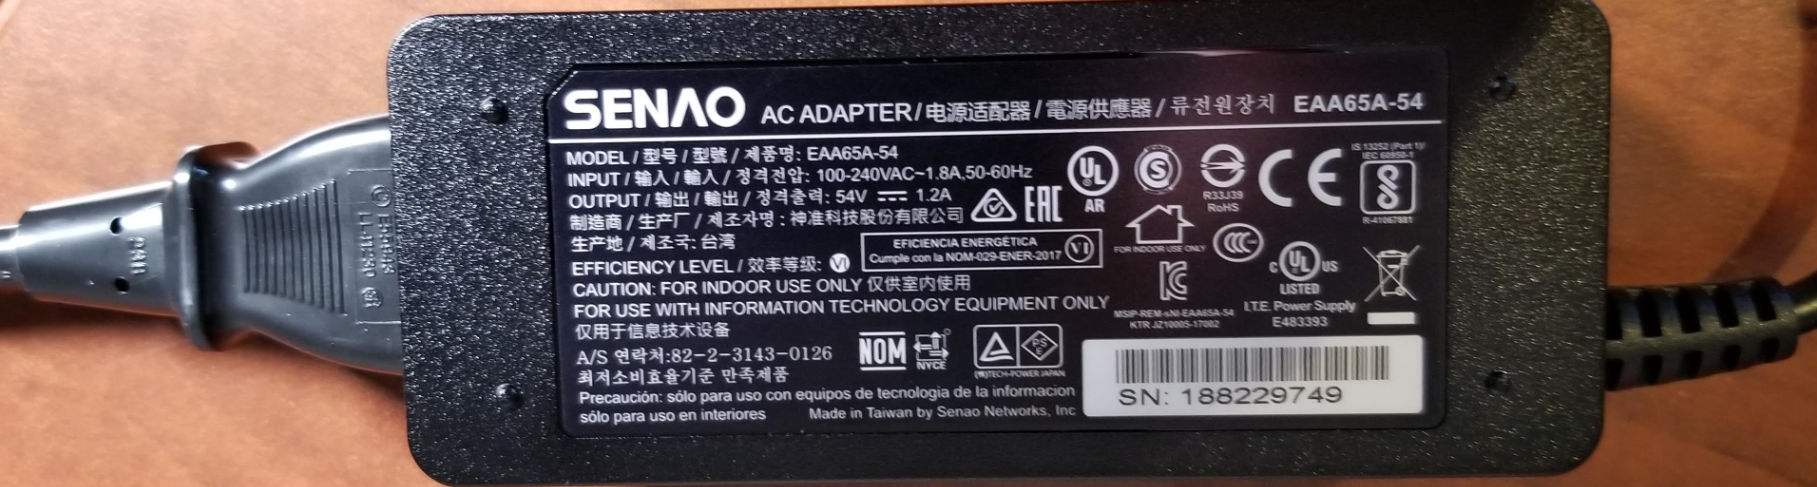
Connect the power supply to AC power plug and the other end to DC plug on the back of the firewall.
Plug the 0/WAN port into your internet connection. Plug the 1/LAN port into your computer. You will configure your network adapter with a DHCP configuration.
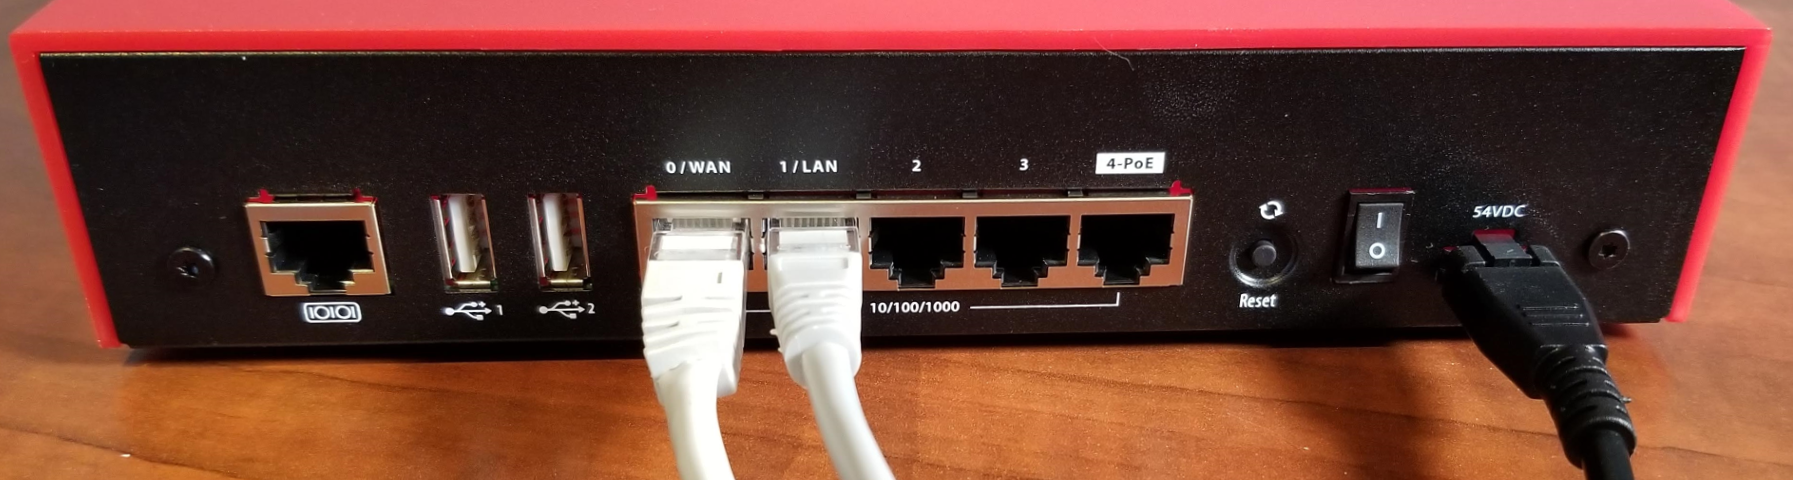
Power up the firewall by turning the switch on. Located on the back.
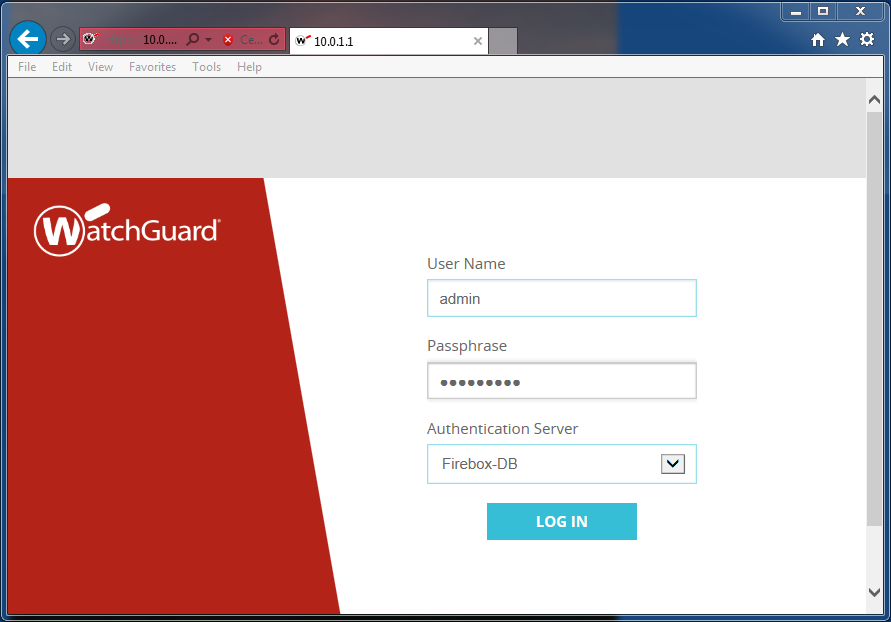
When the firewall boots up, your computer should obtain a DHCP address.
IP: 10.0.1.2
Subnet Mask: 255.255.255.0
Gateway: 10.0.1.1
Once this is complete, you will be able to manage the firebox by entering the following URL into your browser…
Default credentials are…
admin
readwrite
Click Log In to access the web GUI.
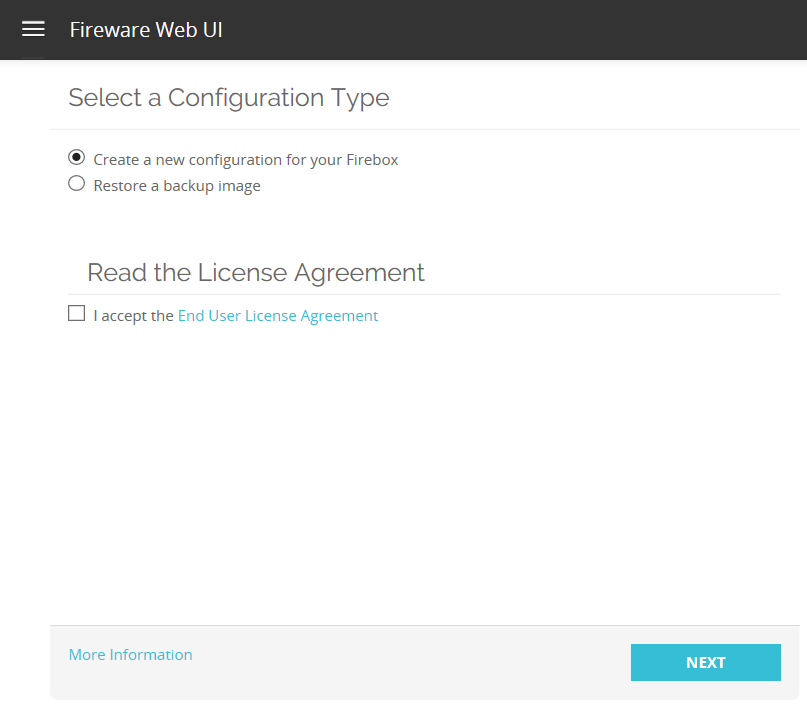
Create a new configuration. Accept the License Agreement. Click Next.
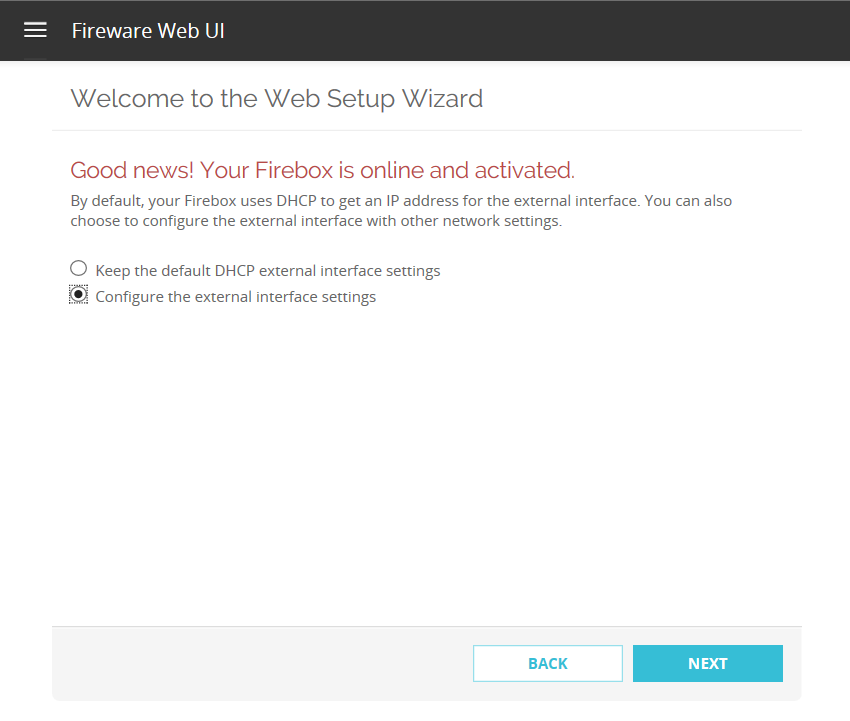
The WAN interface might automatically connect with a DHCP address. If this is how your network will be configured, press Next. I will assign a static public IP in this case.
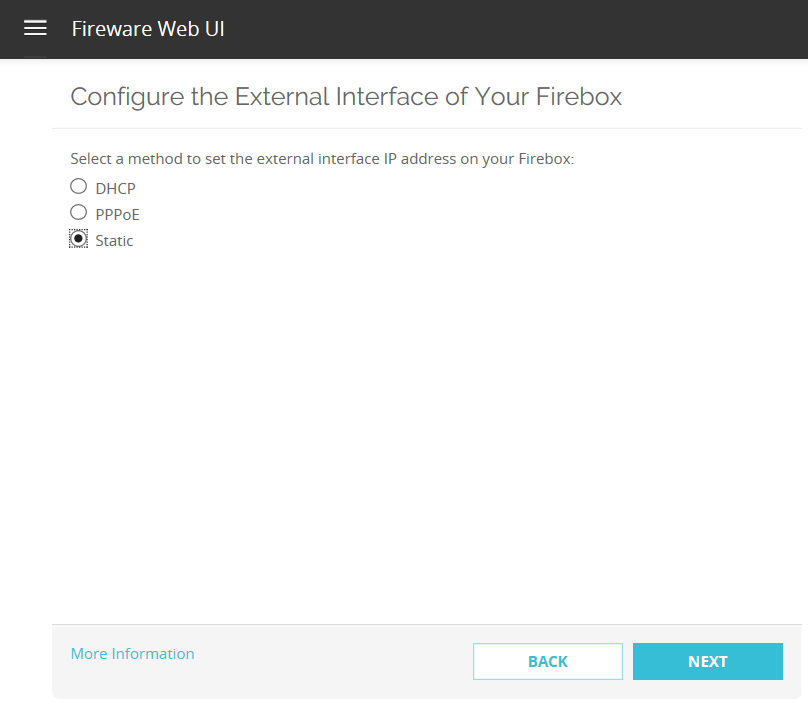
 Click the Static radio button. Click Next.
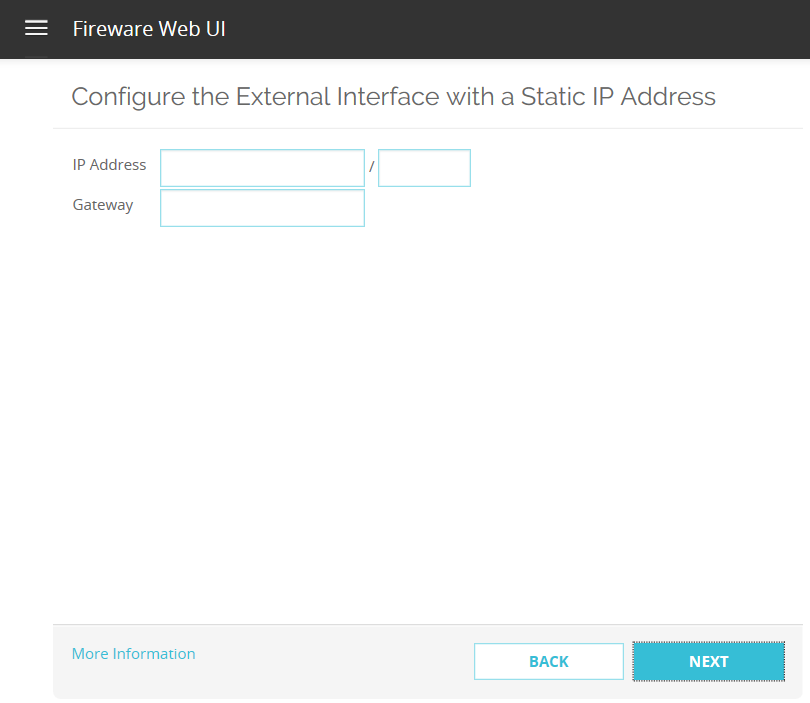
Enter the Static IP information. Click Next.
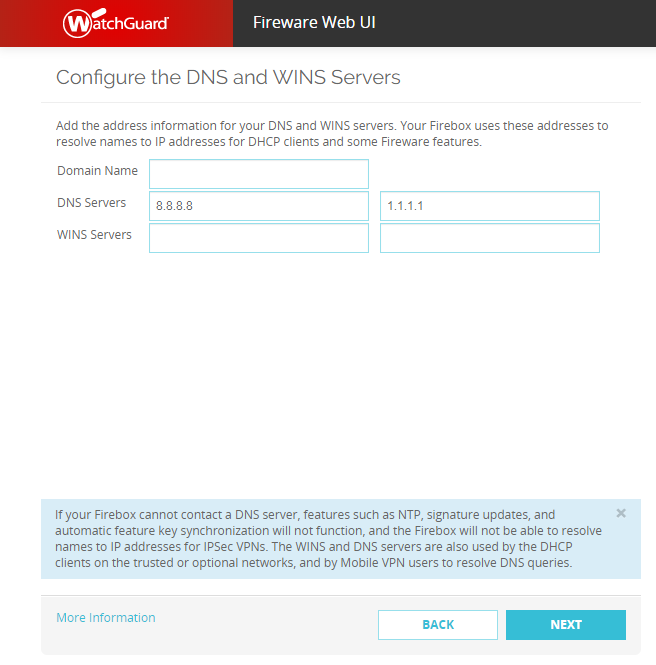
Enter the DNS information. Click Next.
Configure the trusted interface. Click Next.

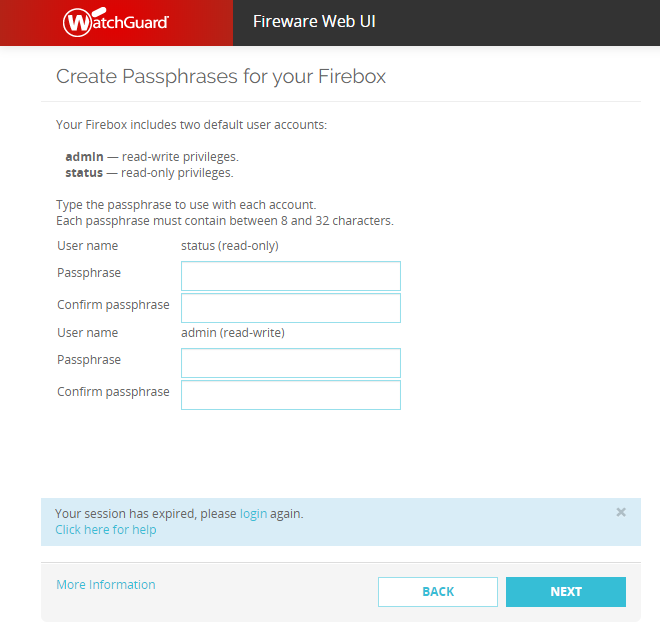
Enter your status and admin credentials so that the device is not accessible with defaults. Click Next.
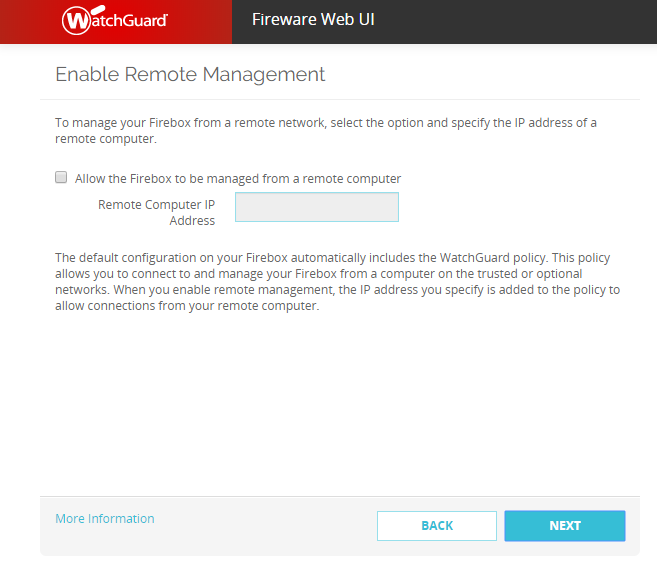
We will not worry about the remote management. Click Next.
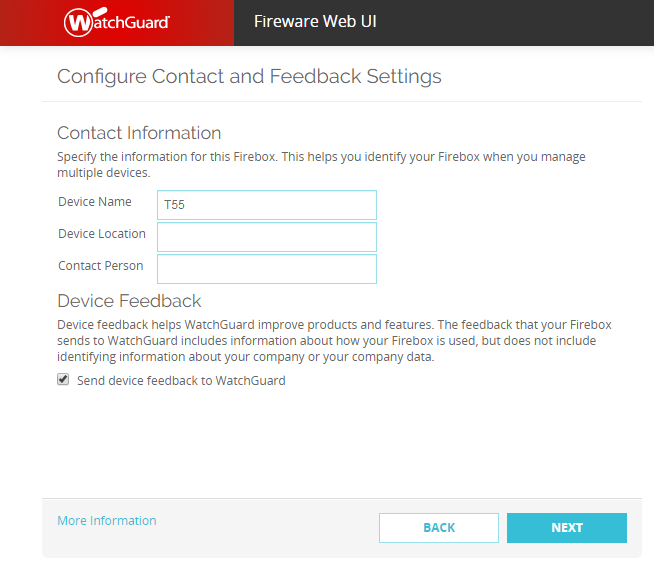
Configure the Device Name, Device Location and Contact Person. Decide if you want to provide feedback and check the box accordingly. Click Next.
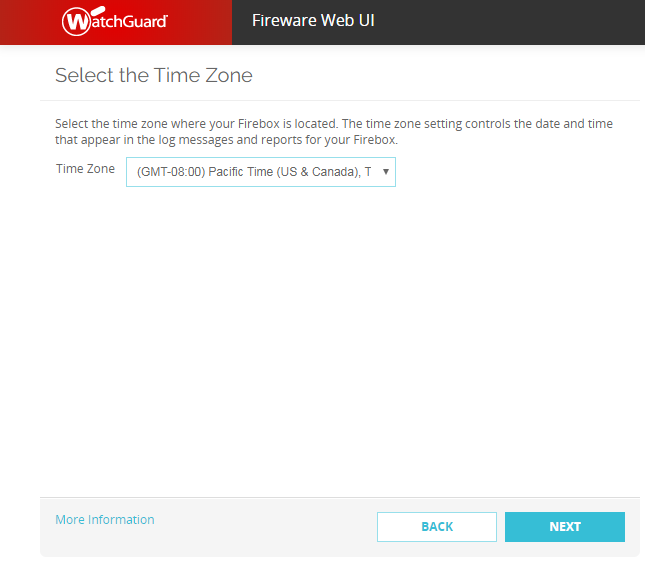
Select the Time Zone. Click Next.
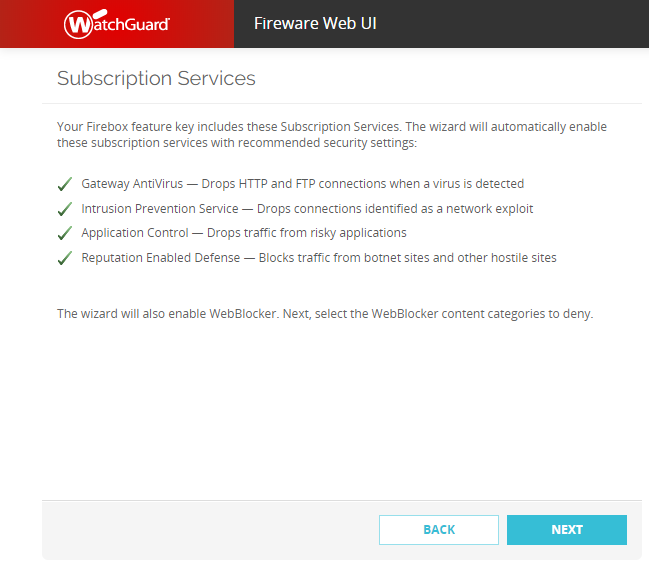
Click Next.
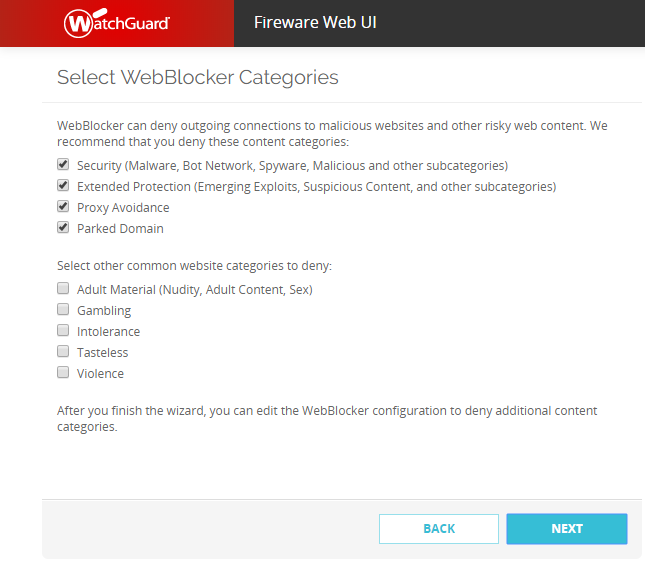
Select some of the more advanced control features. Click Next.
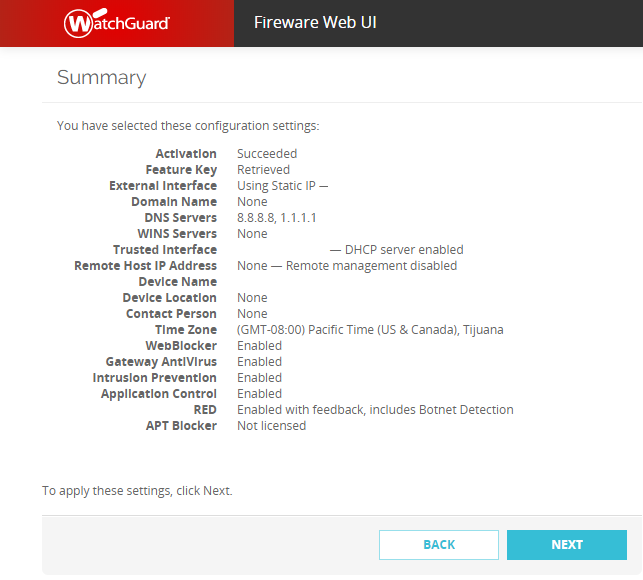
Review your settings. Click Next.
The firewall will apply the new settings. You will be given a new IP address in the new subnet.